
Daily use
Going through a workout
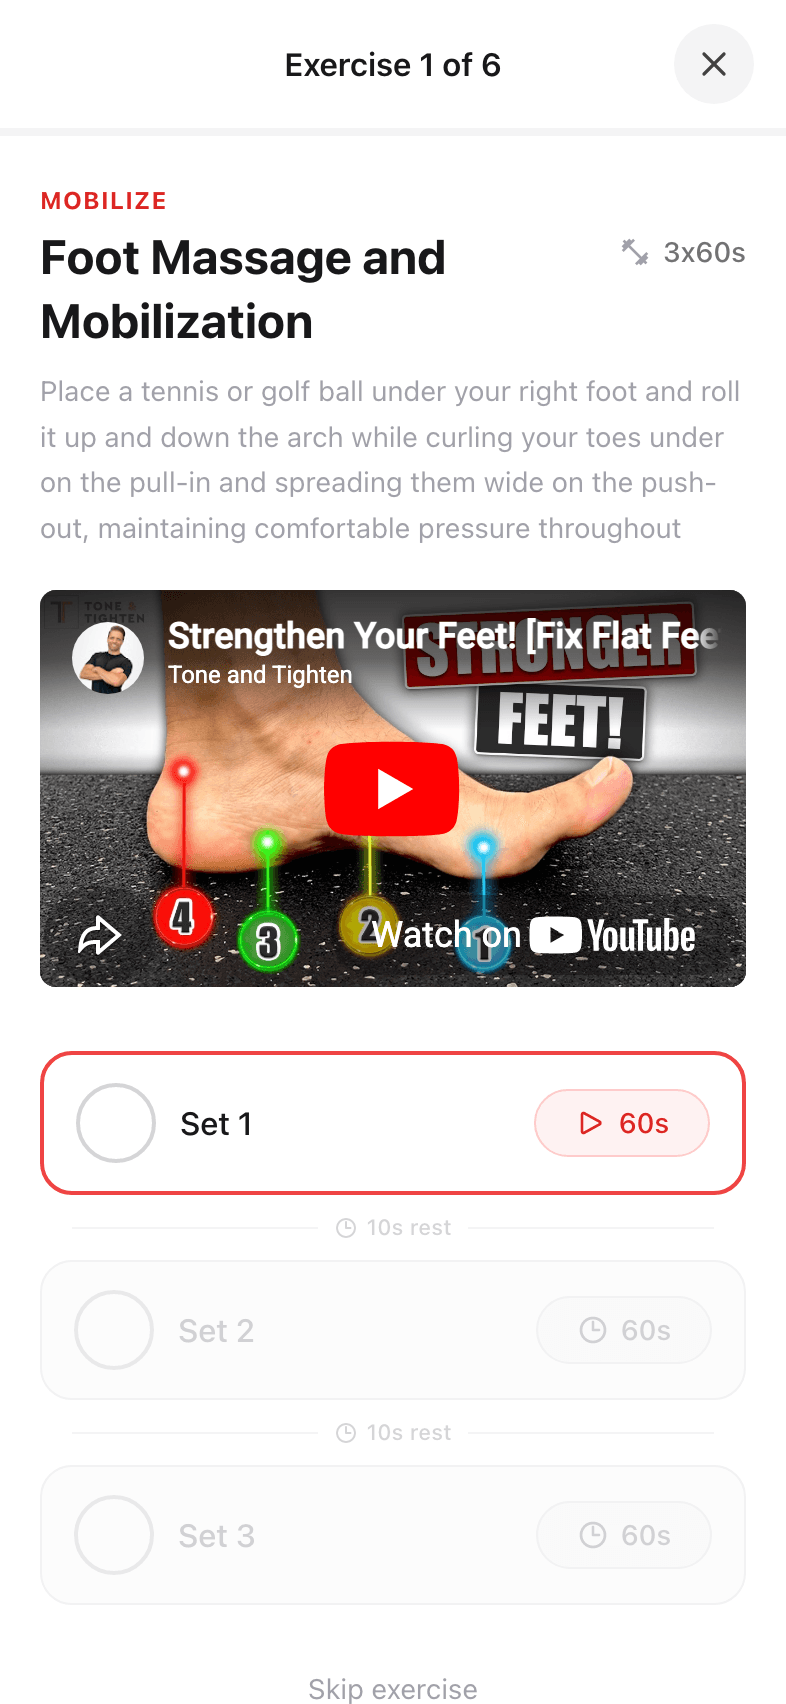
The workout screen is where you spend most of your time. Here’s every button, what it does, and how a typical session flows.
Anatomy of the workout screen
Every workout opens to a single exercise at a time — never a long scrolling list. This is intentional: you should be able to follow along without losing your place between sets.
- 1
Top bar
The X closes the workout (your progress is saved). The "Exercise 1 of 6" counter shows where you are in the session. - 2
Phase tag
A small red label — MOBILIZE, STRETCH, or STRENGTHEN — tells you what kind of work you’re doing. - 3
Exercise name and target
The big title plus the prescription: e.g. "2 × 10 reps" or "3 × 30 seconds each side". - 4
Cue
One sentence reminding you of proper form: "On all fours, slowly arch and round your back in a rhythmic motion." - 5
Video demo
Tap to watch a real PT demonstrate the move. The video opens inline — no separate tab. - 6
Set list
Each set has a checkbox circle on the left and reps/duration on the right. Tap the circle to mark a set done. - 7
Rest timer
Between sets, a small countdown appears (typically 10–30 seconds). It auto-advances when it’s done. - 8
Skip exercise
Bottom-right link. Use it if an exercise hurts or you don’t have the time today — the session continues.
How a session flows
- 1
Tap Start Workout
From the dashboard or a plan detail page. You land on the first exercise. - 2
Watch the demo (first time, or as needed)
Tap the video thumbnail. You can skip the video on later sessions once you know the move. - 3
Do the first set
Follow the cue. When you’re done, tap the circle next to "Set 1" to check it off. - 4
Rest
The rest timer auto-starts. Catch your breath; it’ll fade once the rest is up. - 5
Repeat for each set
Once the last set is checked, the app advances to the next exercise. - 6
Finish
After the last exercise, you’ll see a session summary. Tap done to return to the dashboard — your progress is logged.
Controls in detail
Checking off a set
Tap the empty circle next to Set 1. It fills in to show you’ve completed the set. You can un-tap a set if you marked it by mistake. Sets are tracked per-session, not per-day, so if you fully complete a session twice in one day, both are logged.
Skipping an exercise
Tap Skip exercise at the bottom. The exercise is marked as skipped (not completed) for this session. Use this for:
- An exercise that aggravates pain.
- A move you can’t safely do today (e.g. no floor space).
- Time pressure — better to skip one than abandon the whole session.
Closing mid-workout
Tap the X in the top-left at any time. Your completed sets are saved. When you return later, opening Start Workout begins a new session from the start of today’s routine.
Different phase styles
Mobilize, Stretch, and Strengthen exercises look almost identical, but the prescription format differs:
- Mobilize — usually sets × reps (e.g. 2 × 10).
- Stretch — usually sets × seconds, sometimes per side (e.g. 2 × 30 seconds each side).
- Strengthen — sets × reps, with longer rest intervals.
